Parquet flooring, with its intricate patterns and timeless elegance, can transform any space into a work of art. Whether you’re renovating your home or revamping a commercial space in Dubai, knowing the art of parquet flooring installation is key to achieving that classic, luxurious look. In this step-by-step guide, we’ll walk you through the process, highlighting the intricacies that make parquet flooring a true masterpiece.
1. Preparation is Key:
- Assess Your Space: Before you begin, assess the space where you plan to install parquet flooring. Ensure that the subfloor is clean, dry, and level.
- Select the Right Parquet: Choose parquet tiles or blocks that match your desired pattern and wood type. Consider factors like the room’s size, style, and the traffic it will endure.
2. Gather Your Tools and Materials:
You’ll need:
- Parquet flooring tiles or blocks
- Adhesive
- Trowel
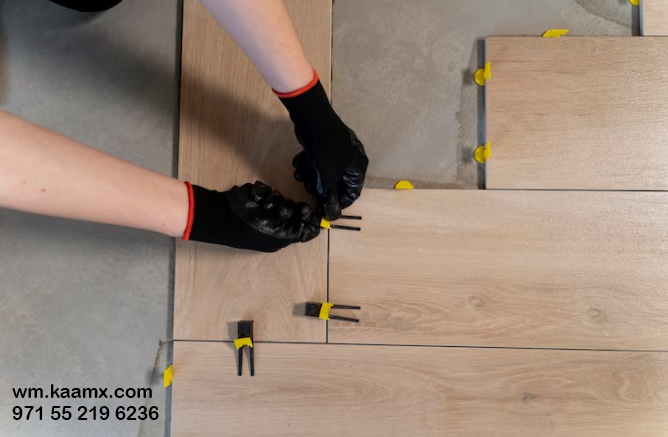
- Spacers
- A tape measure
- A chalk line
- A saw for cutting tiles
- A rubber mallet
- Finishing nails
- A pry bar
3. Start with a Solid Foundation:
- Subfloor Preparation: Ensure the subfloor is clean, smooth, and free from any debris or imperfections. Repair any cracks or uneven surfaces.
- Moisture Barrier: Depending on your location in Dubai, you may need to install a moisture barrier to prevent damage from humidity.
4. Plan Your Layout:
- Dry Fit: Lay out your parquet tiles without adhesive to plan the pattern and ensure a symmetrical look. Use spacers to maintain consistent gaps.
- Establish a Centerline: Find the center of the room and snap a chalk line perpendicular to the room’s entrance. This will be your guide for laying the first tiles.
5. Begin Installation:
- Adhesive Application: Apply adhesive to the subfloor in small sections using a trowel. Follow the manufacturer’s instructions for the specific adhesive you’re using.
- Laying the Tiles: Start from the center and work your way out. Press each tile into the adhesive, using a rubber mallet to ensure a secure fit.
- Maintain Spacing: Use spacers to maintain consistent gaps between tiles. This is essential for the pattern’s integrity.
6. Cutting and Fitting:
- Measure and Cut: When you reach the edges of the room or encounter obstacles, measure and cut tiles accordingly. Ensure a snug fit.
7. Finishing Touches:
- Secure with Nails: In addition to adhesive, secure the edges of the flooring with finishing nails to prevent shifting during drying.
8. Allow to Cure:
- Drying Time: Allow the adhesive to cure as per the manufacturer’s instructions. This can take several hours to a day.
9. Sanding and Finishing:
- Sanding: Once the adhesive is fully dry, sand the parquet flooring to create a smooth, even surface.
- Finish: Apply a wood finish or sealant to protect and enhance the beauty of your parquet floor.
10. Admire Your Work:
Stand back and admire your beautifully installed parquet flooring. It’s now ready to be enjoyed for generations to come.
While DIY installation is an option, achieving perfection in parquet flooring installation often requires the skills and experience of professionals. Muhammad Shaheen Carpentry in Dubai offers expert parquet flooring installation services to ensure your space is adorned with the timeless beauty of this classic flooring style. Contact us today to turn your flooring dreams into a stunning reality.
Call or text 971 55 219 6236 for Art of Parquet Flooring Installation in Dubai