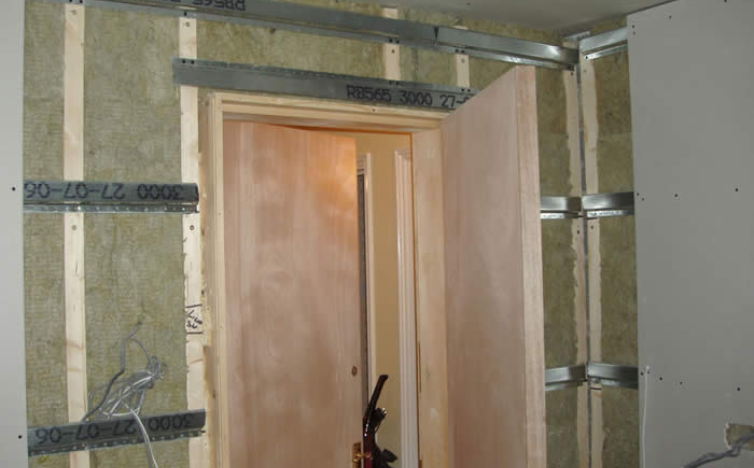
Soundproofing a stud wall is an effective way to reduce noise transmission between rooms or from outside. Whether you’re dealing with loud neighbors, street noise, or simply want a quieter home, soundproof a stud wall can make a significant difference. This guide will walk you through the process step by step.
Materials You’ll Need
Before starting, gather the necessary materials:
- Acoustic insulation (e.g., mineral wool or fiberglass)
- Resilient channels or sound isolation clips
- Soundproof drywall (optional)
- Acoustic caulk
- Mass-loaded vinyl (MLV)
- Green glue (for damping sound vibrations)
- Screws, nails, and a utility knife
Having the right tools and materials ensures a smooth and effective soundproofing process.
Step 1: Remove Existing Drywall
Start by removing the existing drywall from the stud wall. Use a utility knife to cut along the edges and carefully pry it off. This step exposes the studs and allows you to install soundproofing materials directly into the wall cavity.

Step 2: Install Acoustic Insulation
Place acoustic insulation, such as mineral wool or fiberglass, between the studs. These materials absorb sound waves and reduce noise transmission. Ensure the insulation fits snugly without gaps for maximum effectiveness.
Step 3: Add Resilient Channels or Sound Clips
Attach resilient channels or sound isolation clips to the studs. These create a gap between the drywall and the studs, reducing sound vibrations that travel through the wall. Secure them horizontally across the studs using screws.
Step 4: Apply Mass-Loaded Vinyl (MLV)
For added soundproofing, install mass-loaded vinyl over the studs. MLV is a dense material that blocks sound waves. Staple or screw it into place, ensuring there are no gaps or overlaps.
Step 5: Install Soundproof Drywall
Replace the drywall with soundproof drywall or add an extra layer of standard drywall. Use green glue between layers to dampen sound vibrations. Secure the drywall to the resilient channels or clips.
Step 6: Seal Gaps with Acoustic Caulk
Finally, seal all gaps, seams, and edges with acoustic caulk. This prevents sound leaks and ensures a tight, soundproof barrier. Pay special attention to corners and where the wall meets the floor or ceiling.
Contact Muhammad Shaheen Carpentry at 971 55 219 6236, and discover the transformative science of soundproofing for your space.
Conclusion
Soundproofing a stud wall is a straightforward process that can significantly reduce noise in your home. By following these steps and using the right materials, you can create a quieter, more comfortable living space. Whether for a home office, bedroom, or entertainment room, soundproofing is a worthwhile investment.

